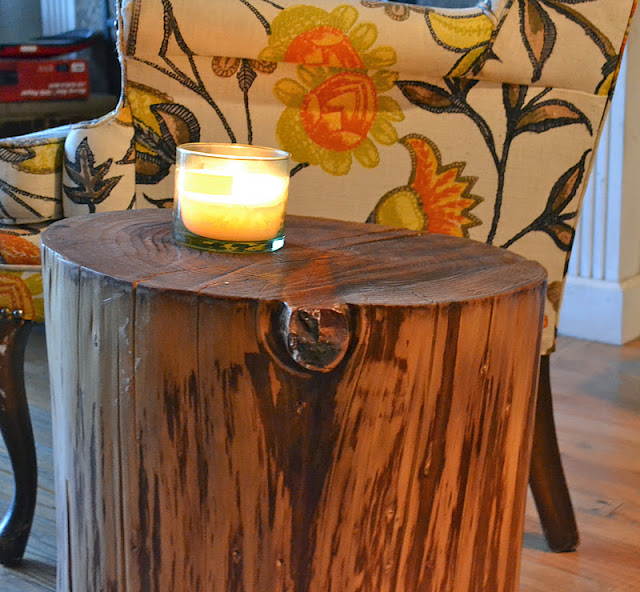
I fell in love with the stump side table from West Elm, just not with the big price tag. I figured it wouldn't be that difficult to make my own and I wanted to give it a try. Nick brought home a stump from his work and we waited for it to dry out, then the restoring/restyling began.
Supplies:
Stump
Crowbar and hammer (muscles would help too!)
Gloves
Sandpaper: 60,120,220 grit
Clear gloss and paintbrush (I posted a picture of the brand/type I used)
Furniture glides *Optional-if you want the stump to have a little lift from the ground
Directions
Let the stump dry out for a few weeks, if not already dried out.
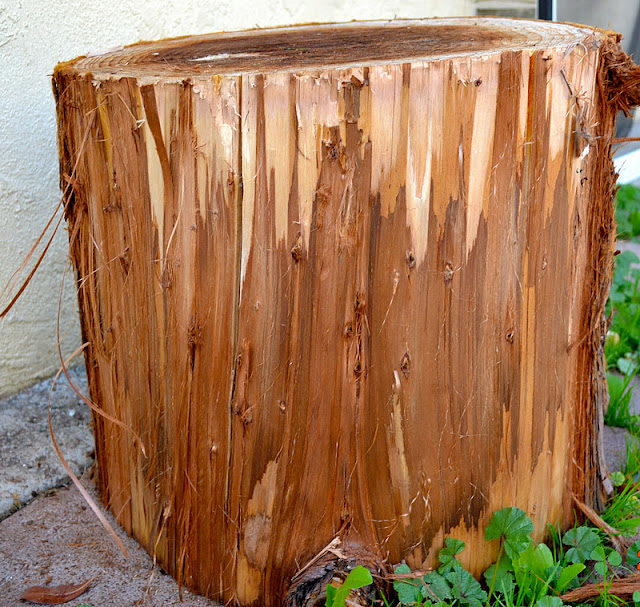
Using the crowbar and hammer pull all bark off the outside of the stump. I lined the crowbar on the top and hammered till the bark would slowly separate from the stump. I flipped the stump upside down so the top wouldn't get messed up if I happened to chip some wood off in the process.
This stump should look like this after the bark is off.
After the bark is off you will want to sand the stump completely, till it is smooth.
It would be faster if you had a electric sander, but I did it all by hand!
I started with the 60 grit then the 120. I sanded until the stump was smooth enough to rub my hand against.
Here is the sanded stump after the 60grit
Here is the sanded stump after the 120 grit
Gloss used for the stump
Wipe down any dust from sanding with a damp towel
I started painting the gloss at a knot in the wood so I would remember where I left off.
Let the gloss dry overnight
The gloss instructions said to sand with 220 grit after the first coat. I sanded it completely, then added the second and final coat. I let it dry overnight.
I used furniture glides to add some lift from the ground.
I lined them up and nailed them into the stump
Finished!
This was an easy and fun DIY that I'm excited to put in our house.
Also, I like my stump more than the West Elm version!


Looks great! I'm so jealous
ReplyDeleteyou are so crafty!! :) yours looks so much better!!
ReplyDeletePS: Mentioning you in a post tomorrow!
What an awesome idea!! Totally pinned for future project! :)
ReplyDeleteHolly shit!! Now THAT's creative!! You're inspiring me! lol.
ReplyDelete-xx-
http://www.myvoguishdiaries.com/
Just came across your blog today and love it! This stump side table is amazing - so impressive! And love your outfit posts too!
ReplyDeletewow, this is beyond amazing!!! You are so talented!
ReplyDeleteGreat job, I've also been wanting to make one of these.
ReplyDeleteOh my! I loooooove this! I'm definitley going to give this a try. Thanks so much for sharing. :)
ReplyDeletewww.glamorsham.blogspot.com
I have been dying to have a go at something like this - I wouldn't mind a painted version too. The only problem I had was where to find a large stump from. This looks great, and I love your gorgeous wing chair as well :)
ReplyDeleteI really like what you did. I've seen the other one on line and I refused to pay for something I could get free. You did a great job. I love reworking things and building things as well...would love to have you visit. Been looking for some great blogs to follow that fit my style. Thanks
ReplyDeletebecky@reinventingtheordinary.com
Where can you buy a tree stump?
ReplyDeleteYour arms must be sore! Wow! It looks great. Found you at Better After.
ReplyDeleteLooks really great. Congrats.
ReplyDeleteSo creative, Cecca! way to go!
ReplyDeleteI love this table so much and now need my hubby to bring me in a stump! You are so cute on that pretty chair w/your stylin' new table. :) Thanks for the tutorial!!
ReplyDeleteWhy in heavens name are they charging $199 for that? And yours looks BETTER!!!!
ReplyDeleteLove! Thanks for sharing!!
ReplyDeleteBrilliant! A friend of mine has the West Elm stump and it is insanely heavy - like so heavy that she can't move it around on her own - so having this little bit-o-lovely that a person can actually move is not only a price improvement but a functionality improvement as well!
ReplyDeleteNice! I would never in a million years BUY a tree stump for the West Elm price...haha! I liked that you put furniture glides underneath...smart move ;-) I made a littler version of this for my outside patio too.
ReplyDeletefound your blog via pinterest. i love this tutorial!!
ReplyDeleteWOW! what an amazing job, I so agree with you...Yours looks so much better!!! Thank you for taking the time to put up the tutorial!
ReplyDelete:)
Jut started this today! Thanks for the great tutorial. :)
ReplyDeletewww.themagnolaivault.com
good luck!
DeleteWhat are the spproximate dimensions on your stump, especially what is the height?
ReplyDeleteThanks.
Andrea
The stump is about 1 1/2 feet high. It's good to make it tall enough for your couch. I wish mine was a little bit taller.
DeleteI am currently trying to do this, but I must have missed something... I'm having such a hard time! One thing I think that makes a big difference is the type of wood you use- it looks like you used Cedar is that right? I think mine is Oak and that was a big mistake. After a week, I am still trying to get all the bark off. :( If you have any tips, let me know!
ReplyDeleteMartusha--try letting the wood dry out more.
ReplyDeletePetrified wood style has always been a personal favorite of mine when it comes to furniture, nothing looks better inside of a house than nature itself. Am I wrong?
ReplyDelete-Asheville Tree Removal
I just love it !!! You did an excellent job for a fraction of the cost and yes it does look much better than the expensive one. Funny I was once married to a tree surgeon who had access to all sizes/shapes/types of tree's and do you think he would bring home 1 tree stump for me. Key word there was "ex". LOL Keep up the good work
ReplyDeleteHah! Thank you for your humor and compliment :)
Deletei stripped and sanded two tree stumps. they looked great. planned to polyurethene them when i got back from vacation. 10 days later, they are growing mold. any ideas?
ReplyDeleteI agree with the comment below. Luckily, I live in a very dry area so my stump had time to dry out. It might be safer to just toss it. Mold is not something to mess with. I would start over and find a dry stump or let it dry out for a few weeks. Good luck!
DeleteIt is always best to spray it with something to kill possible creatures inside. Letting it dry-out is essential. I suggest more than a week. It sounds like your stumps need some more time to dry-out.
ReplyDeleteLOVE THIS!
ReplyDeleteI have read your post. Very informative and great details!! Wonderful blog,Great article and blog. Thanks for sharing your design talents with the rest of us.
ReplyDeleteThis comment has been removed by a blog administrator.
ReplyDeleteLooks great. I like this wooden project very much. It is really great idea to make our home furnished with woods. I love furniture. Also I love your table. It looks so cute. :)
ReplyDeleteThis comment has been removed by a blog administrator.
ReplyDeleteThe tree stump side looks amazing. Very creative idea.
ReplyDeleteBatten Upholstery
Furniture Repairs Brisbane
I love the side table, very unique and creative. I should get one for our clinic.
ReplyDeleteKarl
Plantar Fasciitis Specialist
This comment has been removed by a blog administrator.
ReplyDeleteLooks great. Your table looks so cute. I will make it for home. Thanks for sharing.
ReplyDeletelove this! and looks like something i might be able to do myself. i've seen these sold for like $200!
ReplyDeleteWork of an art.
ReplyDeleteI love how the tree turned into an art.
ReplyDeleteThe TREE STUMP SIDE TABLE is very unique on its own way. It gives me an idea to do more DIY unique furniture that is made of tree.
ReplyDeleteA very exciting article and very unique blog to share.
ReplyDeleteA very unique kind of article that shows a tree turned into a very nice table for living room.
ReplyDeleteA tree turned into a an extraordinary table.
ReplyDelete